Your Cart is Empty
SPRING SALE! CODE: SPRING15


A few of our popular metal sculptures require minimal assembly before displaying. Centinal Sculptures, Maritime Massive Sculptures, and Ribbon Dancer Sculptures come with a pole and blades that are easily assembled in minutes.
Here is a step-by-step guide on how to assemble your Statements2000 Metal Sculpture so you can display your brand new art in no time. Sculpture pole, finial, blades, and the finished base are included.


Step 1: Attach the Pole
Place the sculpture base on a flat surface and attach the top part of the metal pole to the bottom of the pole by snapping it into place. You are now ready to assemble the blades for the sculpture.

Step 2: Assemble the Blades
Take one of the blades and align the bottom hole with the pole. Slide the blade down onto the pole, approximately 10” above the top of the base of the sculpture.(Example 2A)
Repeat this step for the remaining two blades, allowing 10” between each blade. (Example 2B)
Now, take the bottom blade and bend it upward to align the top hole with the pole. Applying inward pressure, slide the top of the blade down onto the pole. Repeat this step for the remaining blades, leaving approximately 10” clearance between each blade. After all the blades are assembled, you can adjust the positions of the blades up or down the pole to achieve your desired look. (Example 4A)

Step 3: Attach the Finial
Finally, attach the finial to the top of the sculpture pole by placing the provided screw into the hole in the finial and tightening the screw to secure in place. You are now ready to display your beautiful new sculpture! (Example 4B)


Step 1: Attach the Pole
Place the sculpture base on a flat surface and attach the top part of the metal pole to the bottom of the pole by snapping it into place. You are now ready to assemble the blades for the sculpture.
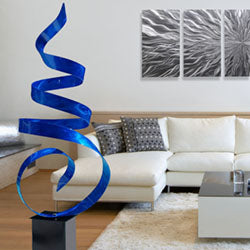
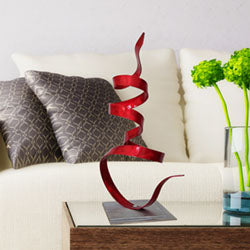
Step 2: Assemble the Ribbon Blade
Align the bottom hole of the blade with the pole and slide the blade down onto the pole, approximately 10” above the top of the base of the sculpture.(Example 2A) Now align the top hole with the pole and slide it onto the pole.

Note: The ribbon blade may arrive slightly compacted from shipping. Simply stretch the blade to achieve your desired look.
Step 3: Attach the Finial
Finally, attach the finial to the top of the sculpture pole by placing the provided screw into the hole in the finial and tightening the screw to secure in place. You are now ready to display your beautiful new sculpture! (Example 4A)

Note: Adjusting the blades may slightly scratch the pole. Any marks can easily be removed by rubbing a Scotch-Brite pad in the direction of the pole texture.
Comments will be approved before showing up.